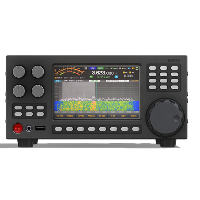





Installation and setup on Windows
Installing EAX on Windows
How to install EAX and the virtual sound cards, connect to the transceiver and make your first FT8 QSO. Windows 10 and 11 (64-bit), about 15 minutes.
What you need
- The ERMAK-TT transceiver is connected to the router and the EAX interface is enabled. You know its IP address.
- A Windows computer on the same network and administrator rights to install the driver.
- For digital modes — JTDX or WSJT-X installed.
On this page
Install the virtual sound cards
A virtual sound card is a “cable” inside the computer: EAX sends audio into it, and JTDX or WSJT-X receive it. You need two cards: one for receive, one for transmit. Choose a driver:
ERMAK VAC
Our driver, free. Low latency. Driver signature enforcement must be disabled before installation.
Virtual Audio Cable
Driver by Eugene Muzychenko. Signed, installs like a normal program. The free Lite version gives only one cable — enough for receive only.
How to install ERMAK VAC
- Disable driver signature enforcement: Microsoft guide. If Secure Boot is enabled in BIOS, disable it.
- Unpack the EAX_VAX_X64_xxx.zip archive.
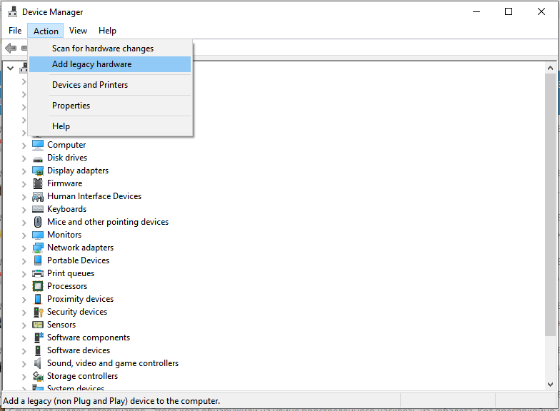
- Open Device Manager → Action → Add legacy hardware.
- Point to the driver folder and finish the installation.
- Repeat steps 3–4 once more so that there are two cards.
Audio format. Open Control Panel → Sound. On the Playback and Recording tabs, for each virtual card open Properties → Advanced and select 2 channel, 16 bit, 48000 Hz.
Check: Control Panel → Sound shows two virtual cards on the Playback tab and two on the Recording tab.
Install EAX
- Run the downloaded file.
- If an old EAX version is installed, agree to remove it.
- Tick Create a desktop shortcut if you want a shortcut, and Run at Windows startup if EAX should start with Windows.
- Click Install, then Finish.
Check: EAX Control Panel is in the Start menu.
Set up EAX
Start EAX and click the settings button  . Select the devices as shown:

- EAX Output — Line Volume (EAX VAC)
- EAX Input — Line In (2- EAX VAC)
- Audio device — your speakers or headphones, for example Speakers (Realtek(R) Audio)
Local IP address is the most important field on Windows. A computer often has several addresses: Ethernet, Wi-Fi, VPN, VirtualBox. Select the one whose first three numbers match the transceiver address: 192.168.1.50 → 192.168.1.10. With another one EAX connects, but there is no audio. Why
Click OK. This is how correct EAX (right) and JTDX (left) settings look:

Connect to the transceiver
- In the URL field type the transceiver address and port 4002, for example 192.168.1.50:4002.
- Click
 .
- Windows asks about network access — click Allow access and tick Private networks.
Check: Speed in the status line is above zero, the L and R meters move.
Set up JTDX or WSJT-X
In the program select Input — Line In (EAX VAC) and Output — Line Volume (2- EAX VAC). Details: JTDX and WSJT-X setup.
Check: JTDX shows decodes. You are ready for QSOs.
Working from the tray
On Windows EAX lives in the notification area, next to the clock. You can hide the window — the audio keeps flowing.

Icon menu (right click): Connect to RIG — connect or disconnect, Speaker — audio to speakers, Mixer.. — receiver selection, Settings — settings, Quit — exit.
The ✕ button and exit:
| What you do | What happens |
|---|---|
| Click ✕, EAX is connected | The window hides to the tray, EAX keeps working |
| Click ✕, EAX is connecting | Nothing — wait for the connection |
| Click ✕ or Quit, EAX is not connected | EAX asks “Do you want to quit?” |
| Select Quit, EAX is connected | EAX asks you to disconnect first (Connect to RIG) |
No icon? Click the ˄ arrow next to the clock. To keep the icon always visible, drag it to the taskbar.
Summary of settings
| Program | Field | ERMAK VAC | Virtual Audio Cable |
|---|---|---|---|
| EAX | URL | transceiver IP address:4002 | transceiver IP address:4002 |
| EAX | EAX Output | Line Volume (EAX VAC) | Line 1 |
| EAX | EAX Input | Line In (2- EAX VAC) | Line 2 |
| EAX | Local IP address | computer IP address on the transceiver network | computer IP address on the transceiver network |
| JTDX / WSJT-X | Input | Line In (EAX VAC) | Line 1 |
| JTDX / WSJT-X | Output | Line Volume (2- EAX VAC) | Line 2 |
| JTDX / WSJT-X | Rig | Hamlib NET rigctl, IP:4532 | Hamlib NET rigctl, IP:4532 |